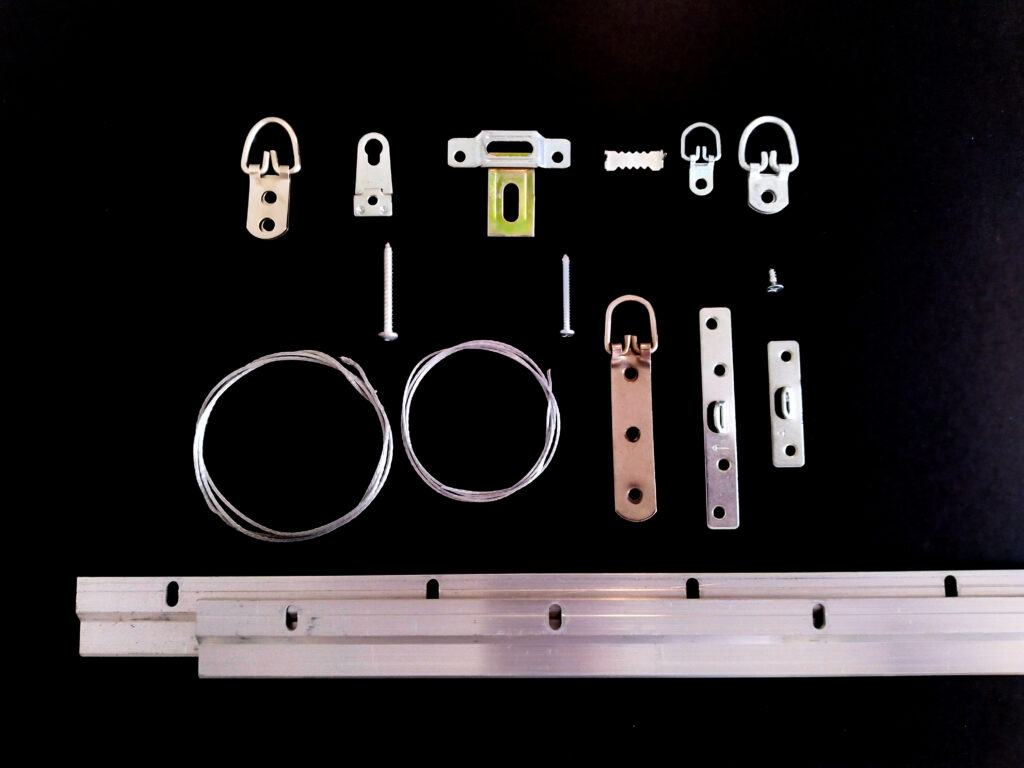
The Hardware That Attaches To the Backs Of Your Pictures
You want the pictures, mirrors, shadowboxes and so forth hanging in your homes and offices to be properly installed on your walls. And for most people “properly installed” means three things:

1. They LOOK good the way they’re hung
2. They’re SAFELY hung, and
3. They STAY PUT where they’re hung
In this post and the next, we’re going to focus on hanging hardware–the hardware which remains attached to the backs of the pictures, and the hardware which remains attached to the walls, when the installation is complete. Today we’re going to talk about the hardware on the backs of your pictures. FYI, I’ll say “pictures” each time, but it applies to all kinds of wall-hung objects, including mirrors, shadowboxes, shelving, & miscellaneous decor.
Looking good usually just means the hardware isn’t visible when the installation is complete. But installing your pictures safely, and making sure they stay put, is worth going into a little bit more detail. There are lots of different kinds of hanging hardware which attaches to the backs of pictures. Some can be used interchangeably, but usually there’s a “best choice.”
Depending on the construction of the picture and the construction of the wall, one type of hardware is usually a better choice than another. Several (but by no means all) different kinds of hanging hardware are shown in the photo. So which is best for YOUR pictures?
Well, as I said, it depends. A super-heavy mirror will usually be best hung with a cleat, like the one shown in the bottom of the photo (it comes as a mating pair). This type of cleat–called a Z-bar–allows screws into the back of the frame every 4 inches, giving it LOTS of grip to the frame. On the opposite end of the weight spectrum, a small framed diploma can usually use simple, small one-hole D-rings and thin wires. Some shadowboxes have very deep but narrow frames, so long screws with 4-hole flangers, plus heavier wires, often work best.
You may have older pieces which have been hung on old wires many times. Those old wires may have frayed or badly rusted, and need replacing. Other times, people may have used multi-hole D-rings and wires, but because of the physics involved, the D-rings were badly warped and dangerous to continue using.
It’s not possible in a short blog post to cover all of the circumstances, and all of the best choices for hardware to be used on the backs of pictures, but it’s absolutely worth making sure that the hardware you do use is in good shape, and will achieve the goals of making sure your installed pictures look good, hang safely, and stay put.
You can see examples of our installation work here. (Click anywhere on this line)
Next time: Choosing The Best Picture Hanging Hardware – Part 2: The hardware that attaches to your walls.
